FREE UK tracked delivery
 Order by 12pm Mon-Fri for same day dispatch
September 2021 - Navigation Top Tips
by Nigel Williams

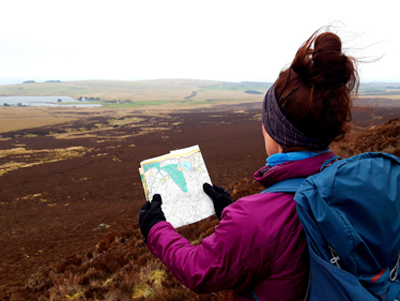
Setting up the Map
1. Folding the map to the area one needs, ideally so that both thumbs can reach the centre of the map from at least two sides, which enables the compass to be held on the map.
2. Printing a digital map blown up. This is particularly helpful if one struggles to see detail on the map.
3. Carry an emergency backup map of a different scale for different or additional information.
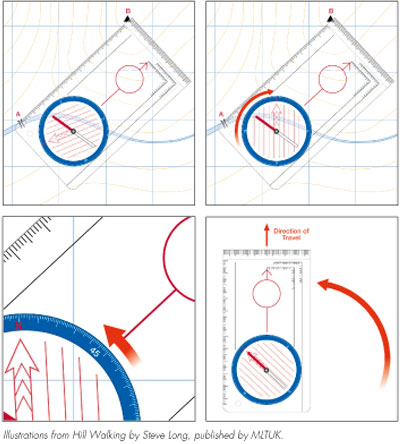
4. This is good for helping to understand the importance of map setting, particularly for novice navigators. Using a map case with a small compass and a strip of red electrical tape added on the north edge of the map, or the case once the map is inserted, speeds up the navigation and decision making as one simply gets the red end of the needle pointing to the red tape. "Red to Red". Even without a map case with a small compass inside, when one folds the map to the area of the planned walk where the top of the map is not instantly identifiable, a strip of red tape on the north edge of the map is helpful.
The Harvey ULTRAMAPS are particularly useful for hand-held navigation.
1. First, undo the loop of cord the compass comes with and tie it singly onto the compass. At the other end tie a big enough loop for the compass to pass through so it can be attached to a waist belt loop or pocket zipper. A small karabiner can be used instead. It can then be held at arms length for accurate aiming and also used comfortably at a natural waist height.
2. Add some beads that grip the cord for pace counting. Slide one along the cord a little way for every 100m distance pace.
3. If operating in an area with a significant magnetic variation, probably 5 degrees or more (not UK for about 25 years), mark the compass dial at the relevant point, so when taking a bearing from the map, rather than having to make an adjustment to the dial one simply gets the red end of the needle to point to the mark. Some compasses have a little screw on the dial which allows it to be tuned and does a similar job. This can be very useful with cold hands or big gloves when it is difficult to make small adjustments. Bear in mind magnetic variation currently around 1º is irrelevant as compasses are generally about 2º inaccurate.
4. Carry a spare compass or make sure there is a second one in the group. There is an excellent range of navigation equipment available online.
5. Lastly on the compass, don't forget to use the magnifying glass to see detail. Hold it a few centimetres off the map.
1. Marking a line down the thumb nail helps pin point your position on a map for others. Using a piece of grass is also good, (GPS - Green Pointy Stick)!
2. Carrying a fine permanent felt pen can be useful, especially in winter if needing to do a dog leg or boxing where one is pacing to a blank piece of map before taking a second bearing. A dot on the map will make the operation a lot more reliable.
3. Taking a bearing in poor weather - turn your back on the wind, kneel on one knee enabling the other to be used as a firm platform to operate the compass on the map with both hands.
4. When a compass bearing really matters, double check accuracy and alignment of the various lines and needle. It is easy for the compass to slightly slip when adjustments are made to the capsule.
5. Pacing is good for up to about 500m. Beyond that a timing card can be helpful for quick time and distance calculations.
Return to the Navigation Blog